Friday, September 30, 2011

31 Days of a Handmade Home

Click here to view all of my 31 Days Project

Week 1:


01 - Destinations Sign
02 - A Morning Without Coffee Sign
03 - Butterfly Mobile
04 - Adhesive Felt Pumpkins
05 - Snakes on a Wreath
06 - Coin Art
07 - Halloween Costumes - Kids

Week 2:


08 - Halloween Costumes - Adults
09 - Alis Volat Propriis Sign
10 - Wax paper Stained Glass
11 - Upcycle: Curtain Hooks to Magazine Rack
12 - The Best Laid Plans
13 - Upcycle: Torn Jeans to Girl's Dress
14 - Upcycle: Stained Dress to Skirt

Week 3:


15 - Curtains, Fort, and Monkey Bars
16 - Chandelier Redo
17 - Fairy Bedroom
18 - Halloween Costumes - Kid's Viking
19 - Hot Glue Faux Candles
20 - A New World (Map)
21 - Give Thanks Ornament


22 - Fish Tank: Primered
23 - Tissue Paper Stained Glass
24 - A New Light
25 - Fish Tank: Painted
26 - Pantry Can Rack
27 - Cupcakes and a Fail
28 - Halloween Costumes: Zombie


29 - Be a Fruit Loop
30 - Halloween Costumes: Alice in Wonderland
31 - Double String Beaded Necklace

Have you heard about the 31 Days? It's being hosted by The Nester (though I heard about it from The Inspired Room). The idea is very simple, you just blog about something for 31 days in a row, or all of October. If you've ever done a photo 365 or something similar I'm sure you know this can be a challenge to keep on top of but that it's also a great motivator.

SO, I've decided to do it! I'm a little nervous (ok, a lot nervous) but it's going to be fun. So what am I blogging about for 31 days? A Handmade Home. It's what I do anyway but the challenge is going to be 31 days. In a row. No gaps. So Exciting!


I hope you'll join me and come back to see what we're up to because it's going to be fun (and any encouragement will be appreciated!). I have a list of 50-60 items I can use, some big some small. Why 50-60 for 31 days? Because some days I'm going to be working on the big stuff that takes multiple days and I'll need smaller things that are easy and I can still get done. And also because I don't know what my life will be busy with on any particular day and this will give me a ton of flexibility since I can pick from a large list. 'Cause let's face it, life with a husband, 5 kids, 7 pets and just life requires flexibility.

And just a reminder since there are several new readers, Turning Stones is also on Facebook if you'd like to follow along there at all.

Thursday, September 29, 2011

Comments and Emails

I LOVE your comments and I appreciate the hell out of them. I do. And I would love to tell you how much :) I always read the comments and if you have a blog I go and look at that too. But if you don't have an email attached to your profile I can't respond to your thoughtful comments.

Not sure how? I'm not sure how it works on Wordpress, etc but on Blogger it's really easy.

On your dashboard just click Edit Profile


Check the box to show your email in your profile and choose where you want that mail to go.


And save. Easy peasy done. Because I really would love to be able to tell you how much I appreciate your thoughtful comments that mean so much to me.

The Importance of Art for Kids

I cannot express enough how important I think art is to children. Even the littlest of projects may stay in a child's mind forever and help shape the person that they will become. My grandmother was a very artistic and creative woman and started in early teaching us kids to love it too. She enrolled me in my first sewing class, helped us make enamels, taught me how to twist wire for jewelry and make coils (like this) and was always such an inspiration. Her home was very colorful and expressive and filled with interesting things for the kids and adults to find fascination in. She also gave me my first copy of Anne of Green Gables and helped cement my love of reading. I can only hope to instill in my children all of the gifts that she gave to me.

Below are a couple of the projects she helped me with. They created memories that I will never forget and, while they just seemed like fun at the time, it started a love of art that I'll always have.

Age 11: (I wasn't really this talented at enamels. My grandmother helped me quite a bit to recreate a drawing that Little-Little and I had made for her.)


Age 10: (My older sister used to draw this all the time and I wanted to recreate it as an enamel. Like the 80's ponytail?)


Age 7: (This was an exercise in perspective. I made this picture with the assumption that I was laying on the ground with the flower in front of my face and the houses off in the distance. My older sister made endless fun of me for thinking that flowers could be bigger than houses...)


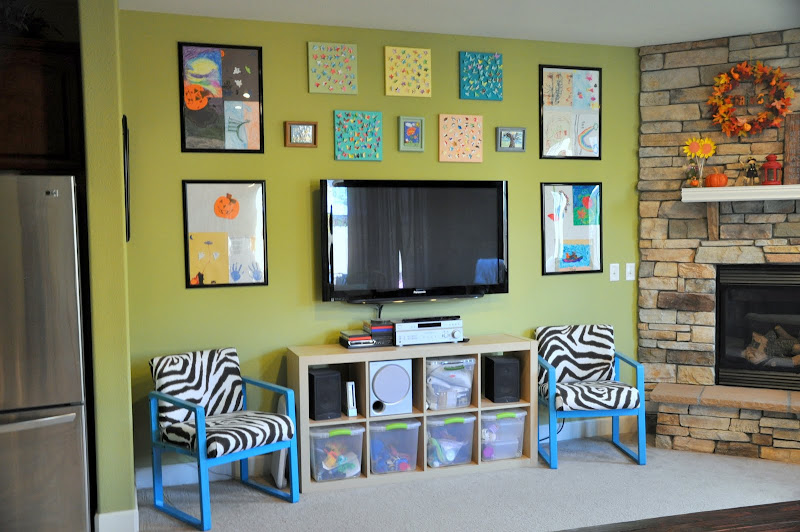
After the kids went to bed last night I grabbed a level and a hammer started changing the art wall around to include my childhood enamels.


I added the canvases the kids made with punches this spring and the enamels I made when I was small (before we found out that the enamel powder had lead in it and they stopped letting me use it. boo). It also brings more blue to the top of the wall and it seems to make the chairs match everything better.


What kind of projects do you do with your kids/grandkids/nephews/nieces?

Monday, September 26, 2011

Teal and Zebra Chairs


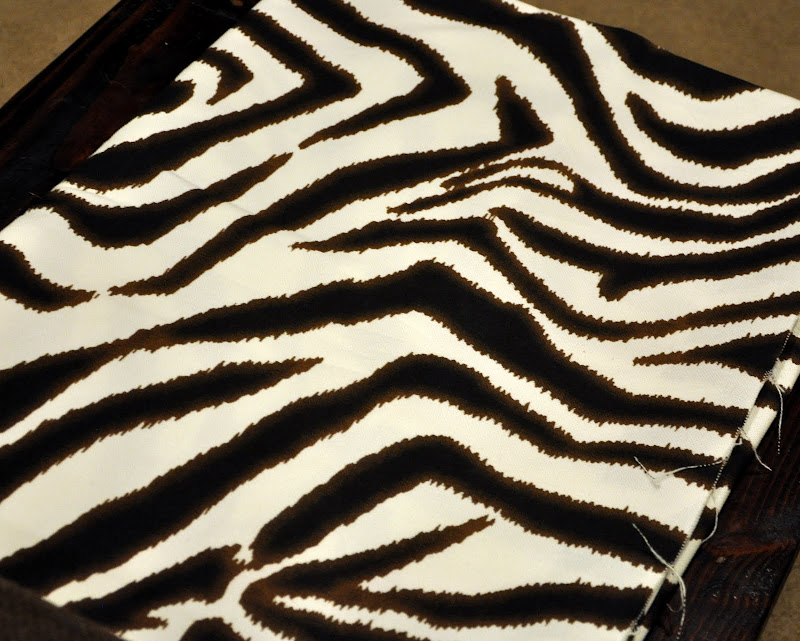
I knew that my living room needed a couple more chairs and when I saw these unloved and filthy little things at the thrift store I knew they would be perfect to fill the space. Then they sat there for a month as I tried to figure out what color to paint them and what fabric to put on the seats. One of the guys at work said I should use a cow patterned fabric like they have on the seats at the corner bar and that jump started my imagination nicely. Sadly there was no cow fabric to be found, though I did find some fun zebra and I like how it worked out. Pulling the seats and backs off of the frames and recovering them was pretty simple but my staple gun has recently turned into an automatic and made that part of the project a little dangerous and living-on-the-wild-side kind of scary.


Husband suggested painting the frames teal to match the DVD shelf in the room and I certainly won't turn him down when he comes up with bright color choices (yay!). So we jumped in to our newly organized garage and got to sanding/painting.


With the color being so bright I think I need to tie it into the rest of that wall a little more so I have some ideas for the storage bins in the IKEA cubbies in order to bring it together a bit.


Now instead of ugly and filthy the chairs are bright and a little fun. My daughter actually squealed when she saw them. I would call that a good endorsement. What that also tells me is that if it becomes too bright for me I know what other room they would have a good home in. :)


How To: Stone Cabinet Pulls/Knobs

When our home was first built I skipped the option of upgrading the knobs on the cabinets and just kept the chrome knobs that were standard. The builder wanted some ridiculous sum of money ($350 ish if I remember right) and I just figured I'd do it later. 3 years later and now I have been looking at options and at $3 a knob, which only affords the plain and kind of ugly cabinet pulls, it would cost me about $120. Yikes!

This is where we started:


Then I saw a link on Pinterest to these and LOVED them. But, they are $75 for 4 of them. So, um, that's $750 for my kitchen. Right, keep looking.


It was at this moment I noticed a jar to my right. It was filled with rocks my grandmother had once collected, I believe from Washington. I had kept them for sentimental reasons after she died since I collect random rocks myself and didn't want them tossed into the flower beds, which is sadly where they were headed. As I looked at them I realized that better than random rocks with no history for a ton of money was rocks for no money with a ton of history.


I started by picking out all the rounded rocks that could make good knobs as there were quite a few that were too oddly shaped for this purpose. Then I started matching them into pairs so each place that two were next to each other would look like they belonged together. I super-glued a flat head screw to the back of the rock and added one nut to go between the rock and the cabinet so it wasn't flush and hard to grab.


One more nut is also needed to hold it on the back side.


I started with these ugly things:


And now we have some knobs that are not only pretty but also have memories. And instead of spending $120+ (or $750!!!) I spent a total of $20 on the screws, nuts, and glue. I did consider using an epoxy that was meant for metal and stone instead of the super glue but I think it wasn't needed. When I attempted to break the screw off of the stone I didn't break the glue, I broke the stone and stronger glue isn't going to change that I can break the stone so I kept it simple.


Now the only thing I'm wondering is if I should seal the rocks or just leave them be? It's possible they might stain if I don't but stones are mostly washable as is so maybe it's fine. What do you think?


Oh, and if you're wondering which type of super glue I use it's Loctite Gel Control. I LOVE that it's not runny and doesn't get all over my hands so it has quickly become my go to glue.

Friday, September 23, 2011

How To: Fall Wreath


I made a couple wreaths for Fall/Halloween this year. I decided to do a fall/not-holiday-specific mantle and make a Halloween wreath for the front door. Since the fireplace decorations aren't holiday themed they can stay up till I break out the Christmas stuff later in the year and I won't have to fuss with changes.

One grapevine wreath and a few dollar store picks like the one pictured below and I got started on the first wreath.


I pulled all of the leaves off the picks and started fitting them into the wreath. I DID NOT use any glue or adhesive for this. Since the wreath is made of vine there are a million little places to tuck in stems that they'll stay put and if I reuse the wreath for something else later I didn't want it all gummed up.


Here's a closeup of a way to tuck the leaves into the wreath if you want to avoid adhesives.


I have the harvest sign from last year and I thought it might be cute in the middle. Clear string would have been preferable but I used what was available and tried to keep any yarn colors in fall hues. The pumpkins and gourds are also dollar store additions. To attach them without glue I stuck them in the back with unfolded paper clips, stuck the paper clips into the wreath, and folded the back of the clips behind the wreath to make them stay.


Other things to make up the mantle:
Erin made the sunflowers from construction paper
The lanterns are from IKEA
The mice are Charming Tails (circa 2001 ish?)
The tree is made from a branch I found while hiking and repurposed from this project
And the In This House sign was a project here

The DIY Show Off

Wednesday, September 21, 2011

Past Halloweens Recap

Fall officially begins on Friday which means that it's about that time of year again to get the Halloween stuff out! This year someone else is hosting the party but we'll have quite a few kids over here so I'll be decorating again. Anyway, here are a few things I did in years past and I'll be posting some new things over the next month.

The pumpkin pendant:


Adhesive felt and pipe cleaner pumpkins. We'll be doing them again this year so I can't wait to see what creative ideas the kids think to add this time (the hands were one of their ideas last year).


From the party decorations post:

A spider webbed ceiling. This will be repeated but moved to another room and changed up a bit.


The spookified chandelier. Another one I'll repeat but add onto.


Bats over the moon and cheesecloth webs. I can't find the bats :( But I'm sure we'll have some fun out there.


Are you getting ready for Halloween soon? What have been some of your favorite decorations either at home or elsewhere?

The DIY Show Off

Tuesday, September 20, 2011

Turning Stones is now on Facebook


Turning Stones is now on Facebook!

Want to know what is going on in between the posts? Are you interested in seeing sneak peeks of upcoming projects? I realized that a lot of my personal Facebook posts are related to my blog and it seemed like the right time to graduate my blog to its very own page. So come join in the fun and see what we're doing!

How NOT to install a light

My home was built about 3 years ago. So I want a time machine to go back about 3 years ago and tell the builder to fire the electrician who installed the lights in my house. While working on Erin's room I took down the old light so I can install the small chandelier for her room. The diagram below is what a basic installation for a light is going to look like (image from here). If you haven't replaced a light before it might take a little while to figure out but it's not overly complicated, right?


Below is what the electrician did in her room (and I assume the others, I'm going to have to look at those). There was NO cross bar. The screws that are supposed to screw the bar into the ceiling were screwed directly from the light to the ceiling like the orange lines indicate. They had to be screwed in at an angle because the holes don't line up. On top of that, one of the screws they put in the ceiling missed the hole and they kept driving the screw anyway with an end result that they put a hole in the box. Yeah, they made a new "hole" for the screw because at the angle they were going they couldn't reach the hole it was supposed to go into.


So, instead of getting her chandelier up yesterday I made another trip to Home Depot. I bought the cross plate and screws to install the light correctly but sadly ran out of daylight for the project. Ah well, I should have pictures of the new light for you tomorrow (cross your fingers for me?).

What kind of unexpected bumps are you running into lately?

Monday, September 19, 2011

Tween Girl Room: Headboard


Having redone the older boys' room recently I figured I should turn my attention to the 3 kid rooms upstairs (the girls and K2). I've started on Erin's redo first only because the idea for it seems to be falling together first (Erin has had some fun ideas for her room that I think are pretty cool. Yay for my creative 7 year old).

The first project for her room was getting the full size bed in and the twin bunk bed out. In order to get the full in she was going to need a headboard. I saw this on Pinterest (originally from here) and loved the idea. Now, I don't have any salvaged wood so I went new. Also, for the theme I working on in there I thought "grow" would be a good word to put on hers instead of "love".

I cut 5 1x6 boards (about $3.50 each) down to 54" and 2 1x3 to 48"


I stained the front and sides of the boards and used the 1x3 for legs. The square made sure I had it all at the correct angle. I left 20" at the bottom for the legs (the height of the mattress comes to 21 so it will overlap a tiny bit) and inset the legs a little so they weren't visible from the sides. I did add another piece of wood in the middle, that isn't pictured here, so the whole thing wouldn't tilt later (needed!).


I made stencils for the letters from printer paper, one sheet each for the r and the o and two sheets for the g and the w. The ruler was definitely my friend here but I free handed quite a bit. To make the o symetrical I folded it in half one way, traced against a window, and then folded the other way and traced that side. That way all 4 sides would be the same. I did the same for the top part of the g as well.


Then I traced the outline of the letters with a pencil. It was barely visible on the stain color, which is perfect so that if I missed painting over a few bits (and I did) then it wouldn't be noticeable.


And voila! One full size headboard for about $20 for lumber and stain (paint I already had left over).


Also participating at:


This project was featured at: (Thank you so much!)


IhookedupwithHoHlamespice